Friday 29 May 2009

Todos a Cáceres em Setembro!!!

2533643059_116cf2e1f7

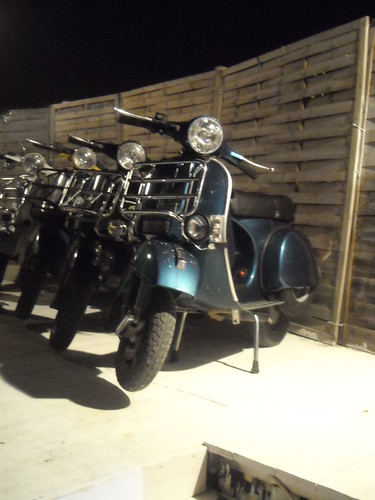
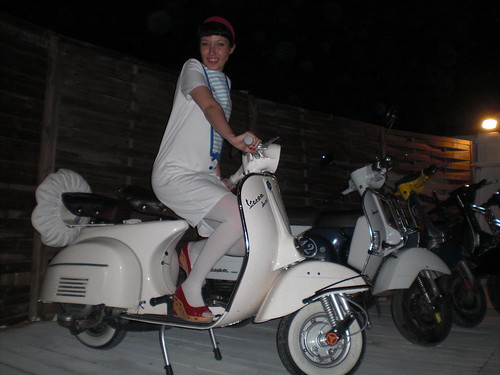
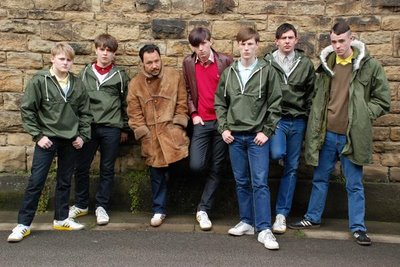
Seguem aqui as primeiras informações sobre o Iº Rally Ibérico de Scooter Antigas a acontecer em Cáceres- Espanha nos dias 19 e 19 de Setembro. O Vespa Gang vai lá estar e a coisa promete...
Quem fizer a sua inscrição até dia 30 de Junho é 60 euros, Depois de dia 30 Junho fica a 80 euros, com direito a 2 noites no alojamento em Albergue, 2 pequenos almoços, 2 almoços na estrada durante os passeios, t-shirt oficial e chapa (!)...concertos, festas...ximbora lá com isso e toca a inscrever para este grandioso encontro.
Depois quero ouvir; eu estive em Cáceres e foi do melhor!!

Detalhes sobre alojamento e estadia, passeios...:

--2 noches de alojamiento (18 y 19 de septiembre) en el Albergue Municipal de Cáceres. Con TV, calefacción y cuarto de baño dentro de las habitaciones. Habitaciones de 2, 3, 4, 5 6 y 7 personas.
--2 desayunos (19 y 20 de septiembre) en el albergue
--2 almuerzos (19 y 20 de septiembre) en ruta
--Camiseta conmemorativa (Color) y chapa.
--Premios a las scooters

Actividades scooteristas:

--Sábado, 19. Salida a Paraje natural de Los Barruecos (20 km) y comida en la localidad de Torremocha (35 Km) (en fiestas)
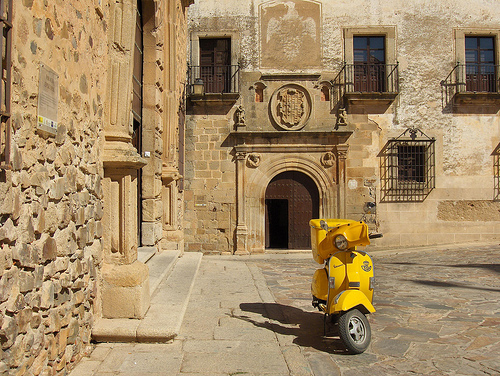
--Domingo, 20. Ruta por Cáceres, declarada Patrimonio de la Humanidad por la Unesco y comida de despedida.

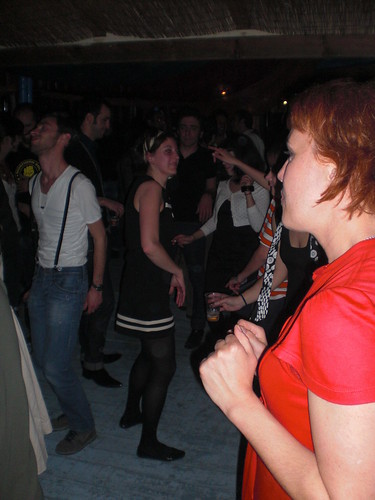
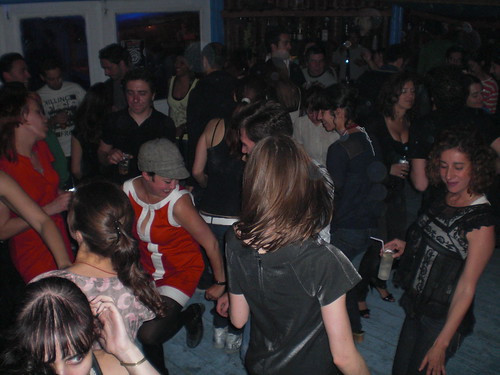
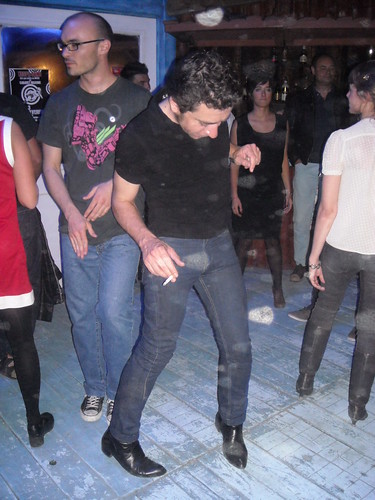
Concertos ao vivo e festas:

--Grupos confirmados: Los grupos españoles The Refoundations (Soul)+ The Dealers (R&B)+ los grupos portugueses The Profilers (Premio POP-EYE 2008 al Mejor Grupo Luso) y The Poppers (Garage-beat).
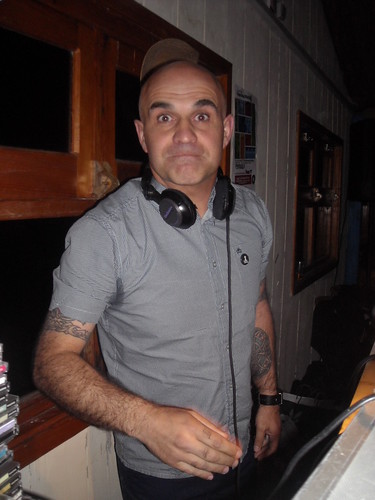
--Djs: Juan de Pablos, legendario locutor de Radio 3, Jose (Jerez), Mod 64 (Two Tone Store-Lisboa), Professor X (Vespa Gang de Lisboa)
--Durante el Rally habrá varios fotógrafos y periodistas que posteriormente narrarán en un libro (que editará la organización) las experiencias vividas durante el fin de semana.
--También se rodará un documental sobre el Festival Cáceres Pop Art, en el que tendrá un papel preponderante el I Rally Ibérico de Scooters Clásicas.

IMPORTANTE:
--Esta oferta es válida para las inscripciones que se realicen antes del 30 de junio. Los que se inscriban antes de esa fecha recibirán, además, en su casa el volumen que prefieran del CD recopilatorio
Moderno...pero español, dedicado a la escena sixties/mod española (catálogo en myspace.com/bonvivantrecords ).

--A partir de esa fecha, las inscripciones pasarán a costar 80 euros (eso sí, con las mismas condiciones)


Las inscriciones se harán a nombre
de la Asociación Bon Vivant en cualquier oficina de CAJA DUERO en el siguiente número de cuenta: 2104-0449-44-9144125826

Una vez hecho el ingreso, los inscritos deben confirmar su presencia en el siguiente correo electrónico:
bonvivantrecords@hotmail.com

Wednesday 27 May 2009

Engine Parts Order #2


I received the second parts order needed to rebuild my engine. I ordered these parts from Jet200.

Quantity / Description / Price

1 x Flywheel nut & washer - Li/SX/TV $3.99
1 x Flywheel dust cover circlip $1.50
1 x Flywheel dust cover $2.99
1 x Li electronic flywheel $90.00
1 x Electronic Wiring Loom - 12v (black) $44.99
1 x Electronic CDI & 12v Rectifier Mounting Kit $39.00
1 x Ducati CDI/Ignition coil $40.00
1 x Ducati 12v/20a AC regulator $45.00
1 x Layshaft needle bearing $12.75
1 x Complete 12v bulb kit $8.50
1 x Gear cluster needle bearing $12.75
2 x Clutch needle bearing $24.70
1 x BGM 120w electronic stator plate $95.99
1 x NGK Resistor cover (spark plug cap) $4.20
1 x HT lead / CDI rubber connector $2.00

Total: $423.36

One more package to arrive with my bearings in it and then I will have everything to rebuild the engine. Hurray!

Monday 25 May 2009

Why does she stall?


Before I can determine if the lights and electrical are working correctly I need the bike to be running. Today is the second time I have ever run it and both times it has stalled as if it lost fuel or something. I need to determine what the problem is soon so I can complete the bike. I did have the choke on in this video and had held the throttle a hair back to keep it from stalling, which only bought me some time.

Suggestions?

Possible reasons:

"Sounds like it's a fuel starving issue. Make sure that the fuel line is down and under to the carb. I had a similar problem once because my fule line was going strait into the carb w/out a j-bend going under then into the carb. Also check to make sure the air hole in the gas cap is not clogged and that the gas tank filter is not clogged. May also be your carb jets are clogged." -Scott

"Air leak. Explains the high rev as well. Carb basket base gaskets and crank seals are the places to look. Start it again and spray some carb cleaner at the base of the carb (inside the air cleaner), then at the bottom of the basket and if the idle drops at all, then you have an air leak there." - Derek

5/27/2009 Update

It is possible that my fuel line is too long. The correct length (stock) is 25 inches and the fuel line is clear on stock bikes. The other to make sure is that there is a "J" bend in the line going up to the carb. It should not feed straight to the carb.

I will measure the length of my fuel line. I suspect that it is too long for the gravity feed fuel system to work properly, hence the stalls from fuel starvation.

I also need to confirm the correct diameter of the fuel line. The black one I am currently using is 5/16". I was under the impression that black was the stock color, but clearly clear would be easier to use since you can determine that the fuel is actually flowing correctly.


Other possibilities to trouble shoot:
1) Air leak. Explains the high rev as well. Carb basket base gaskets and crank seals are the places to look. Start it again and spray some carb cleaner at the base of the carb (inside the air cleaner), then at the bottom of the basket and if the idle drops at all, then you have an air leak there. -- Derek G.

2) You said you have the choke on? I only use choke for the very initial start up, then I turn it off right away and use the throttle to warm up a bike.

The length of your fuel line from the tank to the carb is very important. I usually measure the length like this:

Lift the gas tank out of the bike. The fuel tap should not be allowed to come above the plane of the frame. The fuel line should pull tight not allowing the tap to come up above the frame. Basically you want the fuel line to be as short as possible without making it too hard to reach the bottom of the fuel tap.

I've had this same symptom when my fuel line was too long. This is a gravity feed system. You don't want to have the fuel travel too far "up hill". -- Michael C.

3) Make sure "clear" tubing you use is fuel-compatible. If you're not interested in a 100-point restoration you may want to use the transparent fuel tubing available via mail-order from Aircraft Spruce and Specialty. We've been using it on our race bikes and it works great. Let me know if you want specific part #s. -- Dave S.

4) As everyone said before, the gas line needs to be the correct length. Clear fuel line is not a problem, as long as you get fuel line, and not some other type of clear tubing. First Kick has the stuff you need.

As for the clogged breather hole, it is unlikely that is your problem. However, it is easy enough to check. Simply try to run the scooter with the gas cap open. If it still dies, then the breather hols is not the source of your woes. -- Paul S.

5) Here’s a quick way to check if your fuel line is too long:

Get a second person to help. Have that person lift the gas tank up as high as it will go. Now you kick over the bike. If the bike keeps idling while the gas tank is held up that high, then your fuel line may be too long.

What you are doing here is increasing the potential energy of the system buy making the petcock that much higher than the carb. Increasing the potential energy will help the fuel flow. -- Michael C.

6) Make sure to have a "J" bend in the fuel line going to the carb. The line should not go directly to the carb. -- Scott

Sunday 24 May 2009

JB Weld seat frame nut

The nut, which is welded inside the frame to lock the seat to was free when I received the bike. In hindsight having is welded into place before paint would have been preferred. After paint I had two options and of course welding was not one of them. I could buy a lock washer and a new nut or salvage one more piece of the soul of this scoot using JB Weld to lock the nut into place.
As you can see it worked just fine. I let the glue cure for 24 hours and tested the screw in it and it was just fine.

The secret to a beautiful and easy reassembly is in the prep work before paint. Dry fit your bike. Screw (not rivet) and shape your floor rails on to the bike. Every piece you can fit it to the bike. I bought this bike and my TV175 in pieces so I did not know exactly what was not in place, such as this nut when I started off. More prep work was necessary and more research as well.

Lesson learned: juts buy a new nut, split washer, and screw for this. The JB Weld broke.

Glove box door on frame

Today I installed the glove box to the frame. I used stainless 4mm hardware. I did not take the time to find out what stock hardware size would be. I also used lock washers and washers with this. With I Dremel I removed the hardware stamp on the visible screws.
Note: this picture needs to be rotated. The fender is on the bottom of the picture and the frame is on the top. The reason for this is because, I didn't look at that parts manual to see that I needed double the amount of nuts. You need two nuts per screw. The angle of the screw is not flush. The first nut locks the screw flush with the frame and the second screw (which I believe is similar to a lock nut) locks the glove box to the frame. I worried about the clearance of the fender to this screw, but after looking it over quite a bit I believe I should be good.

I need to buy four new nuts and washers and then redo this job. Should be easier without the screws spinning.

Tuesday 19 May 2009

As fotos da nossa festa 3º aniversário no Hula Hula Beach Club - Caparica

DSCN1501

CIMG1097

DSCN1463

CIMG1124

CIMG1040

CIMG1036

CIMG1093

CIMG1139

DSCN1460

CIMG1169

CIMG1175

CIMG1087

CIMG1120

CIMG1163

CIMG1193


DSCN1466

CIMG1126


DSCN1488

DSCN1485

DSCN1467

DSCN1476

CIMG1107

CIMG1060

CIMG1042


DSCN1490


DSCN1505


DSCN1507

DSCN1514


DSCN1515


DSCN1523

DSCN1494

DSCN1518


DSCN1454

DSCN1540

DSCN1543

Não podia ter corrido melhor, se o São Pedro não tivesse a hibernar e a festa continuava na praia durante o dia todo. Mas lá iremos. Muitos amigos do gang marcaram presença, caras novas, sempre bem-vindas. Houve jantar de aniversário da Elsa Garcia e depois bailarico até as 6 da matina. Os selecters trouxeram o seu groove e não deixaram ninguém parado. Na mesma praia, havia festa estudantil com a confusão que isso acarreta, muito transito no acesso a praia. Mas mesmo assim, ainda houve resistentes que conseguiram passar no meio da confusão de carros e poeira. Mais fotos desta festa, podem e devem aceder ao blog da Isabel Tomás, Style Wars aqui.

Monday 18 May 2009

Awaydays, o filme Casual

awaydays

Na linha de This is England, o filme que estreou recentemente entre nós e que já alguns meses tinhamos recomendado. Surge agora este Awaydays. Baseado no livro de Kevin Sampson, que retratava fielmente a cena Casual, que surgiu no final dos anos 80 em Inglaterra. Neste novissimo Awaydays, um grupo de amigos reune-se á volta de futebol, roupa desportiva, música, copos e alguma porrada com grupos rivais. Enfim, estavamos nos anos 80, Margaret Tatcher governava com a sua mão de ferro e os jovens tinham-se de entreter com alguma coisa. Vivia-se muito na rua e nela havia códigos próprios que surgiam diariamente entre os jovens ingleses. O punk ardeu rápido, o mod revival já era e o Casual nascia nesse preciso momento, inspirado nas viagens dos apoiantes/supporters ás competições europeus de futebol das equipas inglesas que traziam para as ilhas o último grito das marcas desportivas italianas e do norte da europa. A banda sonora está repleta de bandas conhecidas...
Esperamos notícias sobre a estreia deste filme no nosso pais, em data ainda desconhecida. Este Awadays estreia no Reino Unido no próximo dia 22 de Maio.

Eis o cartaz do filme:

awaydays2

...e o trailer

Sunday 17 May 2009

Glove Box Door Seal Install

If I were to do this all over again I would:
1) Put the glove box door to the side.
2) Apply Super WeatherStrip to both the metal glove box door and the strip -- running my finger along it to make it smooth.
3) Let them both dry.
4) Cut several pieces of painters tape and put aside.
5) Apply a new coat of WeatherStrip to only the rubber gasket. Avoid using too much. This stuff goes a long long way.
6) Carefully and quickly put the gasket on the glove box frame.
7) Tape it down with fierce pressure.
8) Put the glove box door on.
9) Close and lock the door so as to ensure the gasket has pressure on it and that the gasket fits properly.
10) Peel the tape back and quickly wipe up any excess. This stuff will eat your paint. You need to clean it up immediately and while it is still wet and wipes up like rubber cement. If it even thinks about drying you are too late.

My advice is, prep and practice a dry run so you do not have any excess to wipe up and use a black Super Weathership to match the gasket. It's tricky business because if you skimp on the sealant it will not hold your gasket in place. But if you use too much you will make a terrible mess that can't be 100% cleaned up.
I am not happy with the outcome of mine. My error was in the lack of prep. It could have been a cleaner job. I had to go back a second time and reapply sealant to a couple spots.

I usually use 3m Super WeatherStrip and I have a bias for that brand.

Note: I suspect that the absolute best way to do this is to purchase Super Weatherstrip Tape (made by 3M). It's double stick tape. Tape it to the gasket and cut the excess off. It will provide a cleaner and more consistent seal. This tape cost a lot more than the actual glue I used, but my glue job is just okay. The tape job would be perfect! There is also a 3m spray mount style adhesive that may also work extremely well. My mentor, Tom G., uses contact cement.

Broken fuel rod lever

It is rare that the metal fuel rod levers spin or come off the fuel rod. It is much more likely to happen to a plastic one.

I was so surprised when my brand new fuel rod lever came off the rod when I turned it. I wrote my mentor Tom G. about how to handle it. I suggested JB Weld.

Tom said:

Hi Jeremy. I've seen that happen with the new plastic fuel rods, but not (until now) with the all metal ones). I don't think JB is going to do the trick for this -- but I guess it is worth a try. If you do, you might want to slight rough up both surfaces to be joined with a dremel, to promote adhesion.

Another method, and a surer one I think would be drilling straight through the handle and rod to the other side, then tapping the hole, and screwing a small diameter machine screw right through. You might use an aluminum machine screw, and then cut off and peen the ends, and polish. Will probably look good, but quite a bit of work to salvage a not too expensive part.


At this point, I believe a replacement part is what is called for. I emailed the dealer, Gene M. of Scooters O (he's a really good guy), and he asked me to try JB Weld first. If not, he'd exchange it. He is also looking at his batch of fuel rods to ensure the rest are okay.

Note: Just graze it if you use a Dremel as I did loose the tight tight fit it had.

CN Enterprise NCC-1701


Sabem quando tudo na vida se conjuga no mesmo sentido?
Não será por isso coincidência que tenha hoje escolhido ir ver o filme Star-Trek, pois naves espaciais sobejam por lá e não pensem que nesses veículos sou total maçarico. Há dias, pelos lados de Arganil, foi-me dada a oportunidade de experimentar a Honda CN250 (Helixprise) do Vasco, cuja única diferença para a Enterprise reside no facto de ter rodas! O resto é igual.
Estão a imaginar uma Scooter? Então esqueçam, não tem nada a ver. Um sofá de dois lugares preenche a sala de comando da nave, fazendo perceber até que ponto os Japoneses prezam a saúde dos seus traseiros. Lugar para os pés? Melhor só se tivesse massagens. O guiador? Esse vem ter connosco, tal como se fosse um sofisticado comando de um televisor de plasma super-moderno, deixando à mão de semear todos os muitos controlos que possui, provavelmente para assegurar o controlo seguro dos mísseis ar-planeta ou da escotilha de viagem plasmo-atlântica. Mas o plasma também existe. Um mostrador digital, em duas, sim duas cores, permite supervisionar toda a actividade a bordo. As rodas ou os buracos ninguém dá por eles, se é que existem, tal é a suavidade em viagens lentas ou rápidas até Mach3, pelo menos.
O silêncio? Nem as orelhas de Mr. Spock se sentiriam incomodadas.
Eu assegurei acima que não era muito maçarico em Intergalactical Transporters, mas tenho de confessar que o tamanho, a força e a roda da frente lá longe, me intimidaram.
No entanto confesso que me soube a pouco. A máquina parece pedir para a deixarmos andar e curvar. A travar nem hesita.
Ao fim e ao cabo quem hesitou fui eu, mas isto já vem de criança. Nunca fui de abusar delas logo no início. Vou apalpando devagarinho e experimentando mais um pouco. Por vezes deixo um pouco para o próximo encontro.

Friday 15 May 2009

Os mod's vão a praia!!


scooterboy skegness 81, originally uploaded by blueandwhite1867.

Alerta! Scooterboys, scootergirls, mod's & modettes, rudeboys ou rudegirls ou simplesmente amigos do gangue estão convidados a aparecer amanhã no Hula Hula Beach Club na Praia do Rei - Costa da Caparica para celebrarmos o 3º aniversário do Vespa Gang Mod Club. Trazer boa disposição e energia para dançar até as 6 da matina.
Para os mais resistentes: trazer saco-cama, toalha de praia e fato de banho para aproveitar alguns raios de sol de domingo.

Auto-Combustão aka Guimarães-Lisboa de T5


Outubro 2008
Sabem o que é um colchão de folhelho? Pois, eu agora também sei e não é propriamente o mais indicado para a véspera de um magnífico passeio pelas nossas maravilhosas estradas, brilhantemente organizado pelo Vespa Clube de Guimarães, que nos levou até à sede do mais antigo Vespa Clube de Portugal. Nota-se que não foi debalde que Portugal escolheu esta localidade e estas gentes para ver a luz do dia. Dia esse que começou bem cedo e após uns bons cinco minutos de sono para os privilegiados, como eu, que não entendi ainda muito bem por que voltas, terei sido o único a ter um quarto individual. Obrigado, mas eu continuo a achar que alguém se enganou. Acompanhado pelo Outeiro em GTS e pelo Carlos em Sprint, desta feita com a minha Heinkel substituída por uma Vespa T5, a única na comitiva, (mas acho que andava lá um motorzito destes disfarçado), respeitei assim um pedido da organização e lá arranquei cheio de remelas mas bem “pequeno-almoçado”, ostentando um enorme autocolante alusivo à Heinkel que não consegui resistir à tentação de levar na minha vespinha (desculpem, mas assim fiquei vingado). Felgueiras, Lixa, Amarante, Baião... e lá começou o percorrer de um bonito percurso embora com pouco tempo para o apreciar. Primeira surpresa na Régua que quando cheguei “já tinham todos ido embora!!!!” Talvez não tivessem gostado tanto como a tri-equipa que integrei, de passar pelo alto de Baião e pela Fundação Eça de Queirós, onde, vindo de Paris, este escreveu parte do conhecido romance: “A Cidade e as Serras”. Mas rapidamente foi de novo posta à disposição uma magnifica bôla de carne e um óptimo Porto que nos confortou o corpo e a alma até Lamego onde encontramos dois experimentados destas andanças e minhas companhias do Lés a Lés, o S800 e o Júlio Santos. Aí comecei a acreditar que não estaríamos assim tão atrasados e lá retomamos o passeio, despachadinhos mas com a calma que convém a uma prova de regularidade. Curiosamente ao chegar a Castro D’Aire soubemos que uma equipa estava já a almoçar... a duas horas de distância... “Regularmente” receando pelo nosso almoço lá fomos andando, acompanhados sempre pela Ambulância e a carrinha de Assistência, a primeira com a sua magnífica “corneta” a assustar toda a gente abrindo-nos assim caminho facilmente. Obrigado ao “menino” e á “menina” que lá seguiam pela simpatia e pela ajuda que viriam a prestar a um de nós que entusiasmado pelas curvinhas, acabou por ficar a conhecer o limite de aderência da sua máquina.
Com a barriga a dar horas, mesmo a chegar ao pé das sandes de leitão e ao colocar a T5 em ponto morto achei que era boa ideia ir mesmo a Fátima pois senti que só podia ser um factor sobrenatural que estava a manter o meu motor em funcionamento MESMO DEPOIS DE LHE TER TIRADO A CHAVE Com a maior calma do mundo, enquanto que eu aterrorizado com a chave na mão e olhos fixos no conta rotações que indicava 8600RPM eu paralisei, o Mauro deixou a sua montada com o seu companheiro das fitinhas nos calções, um espécime oriundo das latitudes de Coimbra, com aspecto duvidoso, mas que em grupo até disfarçava graças a alguns coletes com muitos bordados que afinal existem nestas lides, aproximou-se e com a tarimba de muitos anos e Km de Vespa disse: Sai daí antes que estragues mais. Então não vês que isso é Autocombustão Fechou a gasolina e após o motor parar voltou a liga-lo e voilá! O ralenti certinho de novo. Isto quem sabe, sabe. Vou-me fartar de armar em entendido quando isto acontecer com outro. Ainda acrescentou com um ar verdadeiramente doutorado: Agora vê lá se pões a vela adequada que isto não é uma Heineken... Chegados a Fátima já sem tempo para visitar o Santuário, mas contentes com o bom alojamento que nos esperava. Não sou tipo de agradecer mais de vinte vezes, mas abro aqui uma excepção para me congratular com a forma como fui sempre bem tratado por todos, mesmo aqueles que só virtualmente me conheciam. Novato como sou nestas andanças, notei a preocupação que todos e em particular os organizadores tiveram em assegurar que eu tinha o que precisava. Sensibilizou-me e agradou-me. Farei gosto em retribuir. Até que enfim conheci o Sr. João e confirmei a simpatia de que já desconfiava. Um dia ainda vai ter uma Scooter em condições para andar, vai ver. A manhã de domingo começou com um outro bom pequeno-almoço e um ritmo mais de passeio, que pelo Cartaxo nos havia de levar ao destino. Pelo caminho tive a oportunidade, já que a Heinkel já tinha sido traída e tinha, de fazer um Test-Drive ao “secador” do Júlio, que encurtei com receio de me habituar ao que é bom. Boa para ir ao supermercado e chegar a casa com os ovos inteiros. Ele por sua vez constatou que embora a T5 seja “gira”, não lhe cabem lá os pés. Novamente o Sr. João a tratar de nós como reis, oferecendo inclusive uma escolta policial. Grande Sr. João!
Rumo a Lisboa, estavam já quase cumpridos os cerca de 500Km desta odisseia, começando eu a sentir que realmente um Heinkelista guia tudo. Um passeiozito por locais bonitos de Lisboa, com o rio por perto, oportunidade para conhecer o Tiago Alves, e chegamos ao Vespa clube de Lisboa, onde a Paula e comitiva nos esperava sempre sorridente e prestável. O Ilde acabou por conseguir aparecer também... bolas Como já tinha sido combinado, as Vespas da Tri-Equipa lá saltaram para dentro da Carrinha do omnipresente Paulo e o Júlio Santos ainda foi a casa buscar o carro para nos levar ao comboio. Grande espírito. E por falar em Paulo Salgado. Já repararam que este cavalheiro passa a vida a fazer Km de carrinha para que nós os possamos fazer de Vespa, ou seja ele trabalha para que nós brinquemos. Não foi surpresa, pois não é a primeira vez, mas é de louvar. Obrigado Paulo. Espero vir a ter oportunidade de retribuir. Miguel, Marcelino, Paulo, Vasco e a muito outros que não sei o nome, obrigado por nos oferecerem o vosso trabalho e tempo livre.