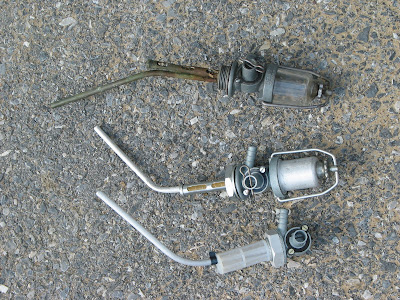
 First off, let me stress a mistake I made . . . I failed to test my fuel tap assembly for gas flow prior to ordering new seals. That was a mistake. My tap was thoroughly cleaned and seals were added, but at best it just dripped as opposed to gushed like it should. Click on the photo above to enlarge it and you will see that my fuel tap is beat up on the gas intake straw. Pictured above from bottom to top are: (1) the new standard non-sediment bowl tap, (2) the Indian reproduction tap, and (3) my original one. Most people I spoke with ALL recommended the non-sediment bowl style, but Tom G. I trust Tom G. 100% and I opted to buy a replacement with a sediment bowl, but I used the stock glass sediment bowl because it fit and seems more authentic to me.
It is "absolutely" vital that before the scoot company mails your new fuel tap that you ask them to wiggle the straw(s) and if there is any movement to get a new one or you will need to solder it. I have heard that fuel taps are hit or miss.
 This is how my set-up looked before installation, minus the plastic catch-all pan pictured below which sits in the frame beneath the gas tank to capture any drips. I had to scrub it first. Note in the picture above that fuel tap almost looks stocks. Make sure to install your fuel tap and set the tank up in a box vertically for over night to ensure that you do NOT have any leaks.
Inside the gas tank before I put the catch-all pan and the gas tank. Note, that due to the fact that the gas flow works on gravity, I shortened the fuel line so it traveled "down hill" as much as possible.

To install the gas tank, let the fuel "On/Off" lever dangle almost vertically down until you can "roll" it through the frame. I failed to do this and in doing so broke the end of the fuel lever. What a pitiful shame.


No comments:
Post a Comment