Showing posts with label glove box. Show all posts

Sunday, 24 May 2009

Glove box door on frame

Today I installed the glove box to the frame. I used stainless 4mm hardware. I did not take the time to find out what stock hardware size would be. I also used lock washers and washers with this. With I Dremel I removed the hardware stamp on the visible screws.
Note: this picture needs to be rotated. The fender is on the bottom of the picture and the frame is on the top. The reason for this is because, I didn't look at that parts manual to see that I needed double the amount of nuts. You need two nuts per screw. The angle of the screw is not flush. The first nut locks the screw flush with the frame and the second screw (which I believe is similar to a lock nut) locks the glove box to the frame. I worried about the clearance of the fender to this screw, but after looking it over quite a bit I believe I should be good.

I need to buy four new nuts and washers and then redo this job. Should be easier without the screws spinning.

Sunday, 17 May 2009

Glove Box Door Seal Install

If I were to do this all over again I would:
1) Put the glove box door to the side.
2) Apply Super WeatherStrip to both the metal glove box door and the strip -- running my finger along it to make it smooth.
3) Let them both dry.
4) Cut several pieces of painters tape and put aside.
5) Apply a new coat of WeatherStrip to only the rubber gasket. Avoid using too much. This stuff goes a long long way.
6) Carefully and quickly put the gasket on the glove box frame.
7) Tape it down with fierce pressure.
8) Put the glove box door on.
9) Close and lock the door so as to ensure the gasket has pressure on it and that the gasket fits properly.
10) Peel the tape back and quickly wipe up any excess. This stuff will eat your paint. You need to clean it up immediately and while it is still wet and wipes up like rubber cement. If it even thinks about drying you are too late.

My advice is, prep and practice a dry run so you do not have any excess to wipe up and use a black Super Weathership to match the gasket. It's tricky business because if you skimp on the sealant it will not hold your gasket in place. But if you use too much you will make a terrible mess that can't be 100% cleaned up.
I am not happy with the outcome of mine. My error was in the lack of prep. It could have been a cleaner job. I had to go back a second time and reapply sealant to a couple spots.

I usually use 3m Super WeatherStrip and I have a bias for that brand.

Note: I suspect that the absolute best way to do this is to purchase Super Weatherstrip Tape (made by 3M). It's double stick tape. Tape it to the gasket and cut the excess off. It will provide a cleaner and more consistent seal. This tape cost a lot more than the actual glue I used, but my glue job is just okay. The tape job would be perfect! There is also a 3m spray mount style adhesive that may also work extremely well. My mentor, Tom G., uses contact cement.

Saturday, 9 May 2009

Glove Box Door Install

Note the correct rivets for the hinges for the glove box door. I spoke with Mic at Scooter Shop an he often makes rivet hinges out of nails. I have been told that the P200 also uses rivets and the ends were bent so they don't slide out. I do not know this for fact, but decided to bend my rivet ends as opposed to cutting and rounding off. After all, unless you stick your head inside the glove box you won't see it ever.
I used a thick headed chisel to bend the softer rivets, but please note that needle nose pliers would have been a smarter and safer option if you choose this method. The reason is the hinge frames that is welded to the glove box inner is a solid surface and when I hammered down on the tip of the rivet it caused HARD vibrations to travel through the hinge frames. The metal of the glove box is thin and it caused "star" cracks in the paint. Which pissed me off, because I know how delicate paint is and had just completed installing the gas tank and tightened everything by hand and finished off with a screwdriver with ratchet attachment to protect the paint and not over correct. In the end, I was very careful beneath the seat (gas tank) and not careful enough on the visible glove box.

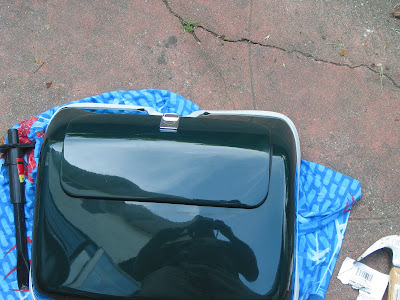
Pictured above is the completed glove box with the rubber trim to silence the glove box door from vibrating. I still need to glue that trim in place with a 3M adhesive. The secret is to use a lot less than you think you need.

Thanx to Max at ScooterWest for the $.90 cent rivets, the correct rear brake switch, and the glove box door trim.